Folks you have using the same stock ASUS ROM on the ASUS Zenfone 2 Laser (Z00T/Z00L) which can be boring UI and slower android OS updates.
You can eradicate your problems now in one go but only if you are ready to take the risk.
Disclaimer: Unlocking your bootloader will void your warranty and Rooting and deploying custom ROM may lead to bricking your device, so kindly do it on your own risk. You cannot blame us as this is just an educational tutorial.
Prerequisites:
- Computer
- Asus Zenfone 2 Laser (Z00T/Z00L)
- Custom ROM / GAPPS (google files) / TWRP Image file (Recovery Boot Image)
[quote_center]Note: The device which we are using is Asus Zenfone 2 Laser which is Z00L. The method is same for both the Model[/quote_center]
Difference between Z00L and Z00T:
| Z00L | Z00T | |
| CPU | Snapdragon 410 | Snapdragon 615 |
| Display | 1280×720 | 1920×1080 |
Another way to find out your device model without getting confused is check by going to settings = select about = check “Model Number” showing as “ASUS_Z00Lx.”
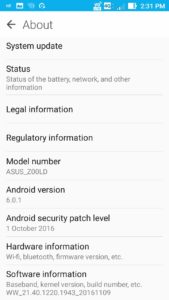
‘X’ it will show you any letter which is just country/ram specs variant nothing to worry about so I want you to focus on the word (Z00T/Z00L).
If your device is dead or really not sure about which Model Number you are using would suggest you remove the back cover of the device and popup the battery and check the model as the screenshot below.

Method:
Download the files as per their website portal.
- Download TWRP.
- Install TWRP
- Find & Download Right GAPPS
For the best Android Custom ROM Experience we have generally selected] [Z00L/Z00T][7.1.1] Resurrection Remix N
Resurrection Remix ROM is based on AOKP, CM, SlimROMs creating a combination of performance power customization and new features on your device!
It is one of the most stable ROM, customizable and updated. Therefore, I have personally tested and currently using this built.
Currently this ROM is updated to Android 7.1.1.
Note: The developer of this ROM is still under development stage as confirmed by the developers on XDA forum, so for any bug reporting or support issue you can contact the developer from XDA.
Click here to download [ROM][OFFICIAL][Z00L/Z00T][7.1.1] Resurrection Remix N –
http://forum.xda-developers.com/zenfone-2-laser/development/rom-resurrection-remix-n-t3509698
Note: Before we start with the installation process, we would like to inform you that our device already has unlocked bootloader.
- Now unplug the USB and Power off the device
- Boot to TWRP – Custom ROM:
- Before we boot to the Custom ROM, make sure that your device is completely powered off.
- Press and Hold the Volume Down and the Power Key for about couple of seconds.
As soon as the device vibrates and you view an ASUS boot logo on the screen, you may only leave the Power Key and keep holding the Volume Down key.
If you see the screen below, Congratulation you have successfully installed and booted to TWRP. Once you see the above screen, select the “Wipe” option. After selecting the wipe option, select the “Advance Wipe” option as the screenshot below
[quote_center] Note : The below steps given below will erase your system(ROM Files), Internal SD Memory, Cache and user data. [/quote_center]
To Clear and make space for the device by performing the given method, by selecting Dalvik / ART Cache, System, Data, Internal Storage, Cache and ASDF.
- Swipe to wipe
- Now you will see the command line running below
Automatically you will get the option on the screen which will complete the wipe/erasing the data in the system memory.
Select back and then connect the USB from the computer to the device. Once you have connected the device then copy the 2 files which are Custom ROM and the Gapps File. Make sure that you copy the Custom Files and paste it to the Internal memory of the device like the image below.
Once the files are copied, you are free to pull the USB device and start another process in the custom recovery TWRP.
Now select Install and select the Internal storage option , by default it is always selected as Internal Storage and you will able to view only 2 file as you have copied earlier.
- Now select the copied zip files and you will see like the screen shot below
- To add another zip you can select the option for adding another zip file and Swipe to install the selected zip files in the device.
- You will start seeing the script running in TWRP command line by which you are able to view what is installing in the device.
- Kindly be patient as this sometimes take approximately 15-20 mins for this process to complete.
Once the process is completed then you can see as in the image below, it is mandatory that you will need to select the option to “Wipe Cache Partition”
- If you are facing driver issues for fast boot mode, you can try the this link.
- Now you can select as the screen below to reboot the device and continue to boot to the OS state.
- Here are the screenshots for Boot Screen.
- Make sure that you will require patience for this as this take 10-15 mins to boot the device to existing state.
- Congratulation! You have successfully booted to Android Marshmallow.
Once your device boots this you will view the home screen as below on the screen: